

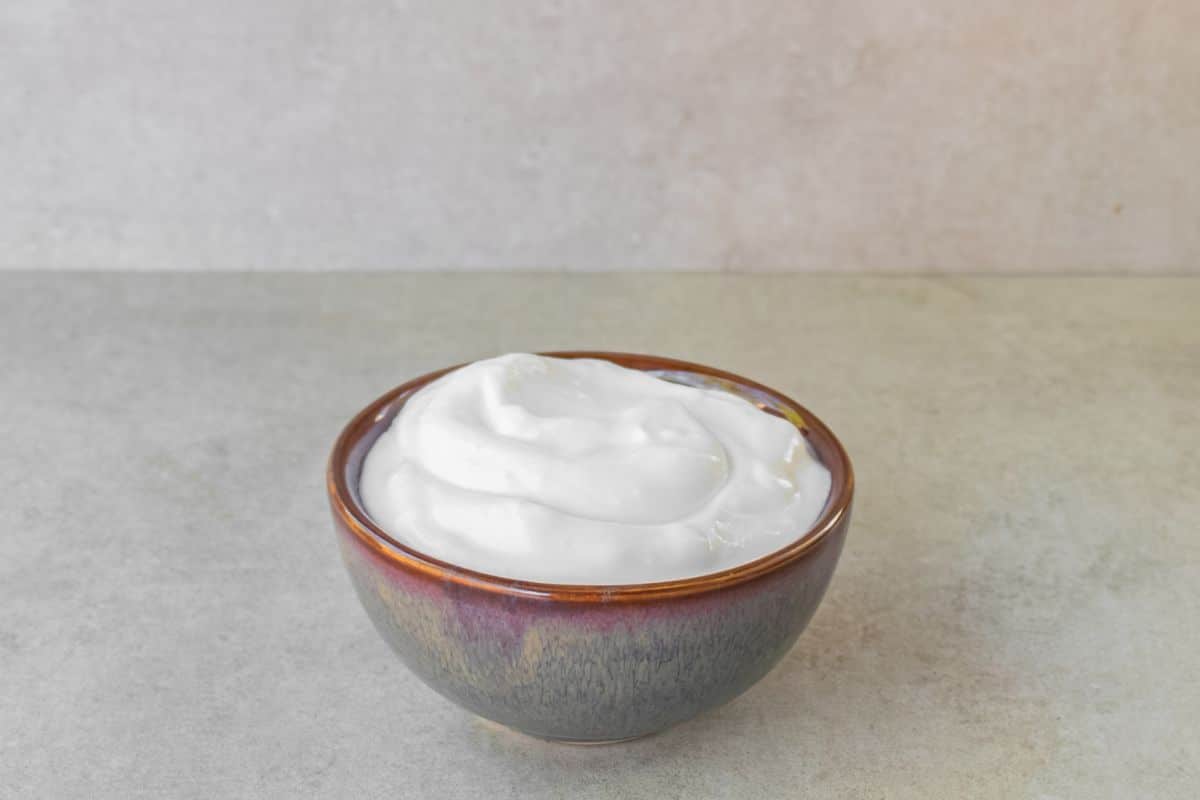
Homemade vegan coconut yogurt is not only cost-effective but also incredibly fun to make. Unlike cow's milk yogurt, coconut milk requires a bit of extra help (in the form of tapioca starch or another thickener) to achieve that creamy, luscious texture.
We also rely on vegan probiotics or a coconut yogurt starter culture to give it the tangy flavor and gut-friendly benefits you expect from yogurt. If you're looking to boost your gut health and enjoy a delicious plant-based alternative, this recipe checks all the boxes.

Coconut adventures
I remember my first taste of store-bought coconut yogurt: smooth, thick, tangy, and creamy. However, many options on the market are packed with added sugars, making it hard to find a truly wholesome choice.
That's what inspired us to start making our own. Surprisingly, creating vegan coconut yogurt from scratch is easier than you'd think - and it allows you to control the sweetness, thickness, and ingredient quality.
Today, we're excited to share a go-to recipe that yields a rich, probiotic-packed yogurt and equips you with a valuable kitchen skill. Enjoy the satisfaction of homemade coconut yogurt that's tailored exactly to your preferences!

Nutritional Content
Probiotics
- These "good bacteria" can aid digestion and support a healthy immune system.
Healthy Fats
- Coconut milk contains medium-chain triglycerides (MCTs), which can be a quick energy source.
Tapioca Flour
- A naturally gluten-free thickener that helps achieve the perfect yogurt consistency without dairy.
Fiber (optional psyllium husk)
- Psyllium husk offers additional fiber, supporting digestive health.

Ingredients you will need
- 500 ml Full-Fat Coconut Milk (canned or homemade)
- 5 g Tapioca Flour
- 1 Probiotic Capsule (or 2 tablespoons of coconut yogurt starter culture)
- 10 ml Maple Syrup (optional) Acts as "food" for the probiotic cultures, enhancing fermentation and flavor.
- 1 tablespoon Psyllium Husk (optional) For extra fiber and thicker texture.

Why these ingredients?
- Coconut Milk: Provides a rich, creamy base and signature coconut flavor.
- Tapioca Flour: A versatile thickening agent, giving this vegan yogurt its smooth texture.
- Probiotics or Starter: Introduces beneficial bacteria for tanginess and gut-friendly goodness.
- Maple Syrup: Slight sweetness that also helps jump-start fermentation.
- Psyllium Husk: For an even thicker consistency and added dietary fiber.

Equipment you will need
- Small Saucepan for gently heating the coconut milk mixture.
- Whisk to prevent lumps and ensure the tapioca flour is fully incorporated.
- Thermometer (optional but helpful) to gauge the correct temperature for adding probiotics.
- Sterilized Glass Jar or Container with a lid or cloth cover for fermentation.
- Clean Spoon or Spatula to stir without introducing unwanted bacteria.

How to Make the Recipe (Step-by-Step Instructions)
Prepare the coconut milk base


Cool down the coconut milk


Ferment the yogurt


How to make extra-thick probiotic coconut yogurt
- Add 2 tablespoons of coconut yogurt into a bowl and whisk in 1 tablespoon of psyllium husk. Pour back into the jar and stir together well.
- Stir 2 tablespoons of chia seeds into the jar of fermented coconut yogurt. Chill for at least 2 hours until thickened.
- Transfer the yogurt to a strainer lined with cheesecloth and set over a bowl in the fridge. Allow to strain overnight.
What to serve vegan coconut yogurt with
- Fresh Fruit & Berries: Strawberries, blueberries, mango, pineapple, or sliced bananas pair well with the yogurt's natural tang.
- Granola or Muesli: Adds texture and crunch. Try our Vegan Granola or Oat & Chia Seed Bircher Muesli Recipes
- Smoothies & Shakes: Blend a spoonful for an extra creamy, probiotic-rich boost.
- Dressings & Sauces: Substitute for dairy yogurt in savory dishes like curries or salad dressings for a plant-based twist.

How to store coconut yogurt
- In the fridge: Keep in an airtight container for 5-7 days. Stir occasionally to maintain consistency.
- Signs of spoilage: If you see discoloration (like pink or grey), mold spots, or notice an off-smell, discard immediately.
- Re-culture: Reserve a few tablespoons of your finished yogurt as a starter for your next batch.

Troubleshooting
If your yogurt develops pink or grey discoloration on it's surface, that means it has been contaminated with bad bacteria. Do not eat!
When making any fermented recipe it is important to use very clean equipment and do not contaminate it with dirty spoons or foreign objects! Always trust your nose, we have a powerful sense of smell. If something seems overly pungent it is best to throw it away. Remember fermentation is finding that sweet spot between raw ingredients and rotten ingredients!
FAQ Section
Tapioca flour is an excellent, easy-to-source thickener. It yields a smooth, spoonable texture akin to traditional yogurt. However, agar agar can also be used if you prefer a firmer set.
While optional, a small dash of sweetener helps feed the probiotics. You can use coconut sugar, agave, or omit sweetener if you prefer.
Yes, but your yogurt may be thinner and less rich. Full-fat coconut milk gives the creamiest, most luxurious texture.
Double-check you've simmered the tapioca mixture long enough and at a steady temperature. Also, ensure the probiotic culture was added at the correct (lukewarm) temperature.
Ferment it longer (up to 24 hours or more) and ensure the environment is warm. You can also stir in a little extra probiotic powder at the end if you like.
More recipes to try
- Coconut Chia Seed Pudding
- Spiced Almond & Coconut Flatbread
- Sesame Bircher Mueslii
- Creamy Tahini Sauce
- How To Make Water Kefir
- Pineapple Tepache
Homemade vegan coconut yogurt
Making your own Vegan Coconut Yogurt is as simple as combining full-fat coconut milk with the right thickener and probiotics - then let time and nature do the rest. With this recipe, you'll not only save money but also enjoy full control over flavor, thickness, and quality.
We hope you enjoy this delicious recipe. If you give it a try, let us know in the comments below - we love hearing your feedback and seeing your recreations.
📋 Recipe


BREDA says
Super. Thank you.I will try this.
Florencia says
I wanted to add vanilla flavor, should I add it after it’s past the cultivation period?
Jamie Raftery says
Hi Florencia. I would add the vanilla after the cultivation stage. You can stir in the vanilla after the coconut yogurt had some time to chill and set in the fridge. Let me know how it turns out 🙂