Holistic Chef Academy

menu icon
go to homepage
  • About
  • Recipes
  • Services
subscribe
search icon
Homepage link
  • About
  • Recipes
  • Services
ร—
Home ยป Recipes ยป Fermentation

How To Make Tempeh

jamie-author-bio
Modified: Aug 30, 2023 ยท Published: Apr 9, 2023 by Jamie Raftery ยท This post may contain affiliate links ยท Leave a Comment
Jump to Recipe Print Recipe

In this article I'll walk you through the process of How To Make Tempeh from scratch. We will cover each step from selecting the right soybeans, inoculating with a starter culture, and incubating the mixture.
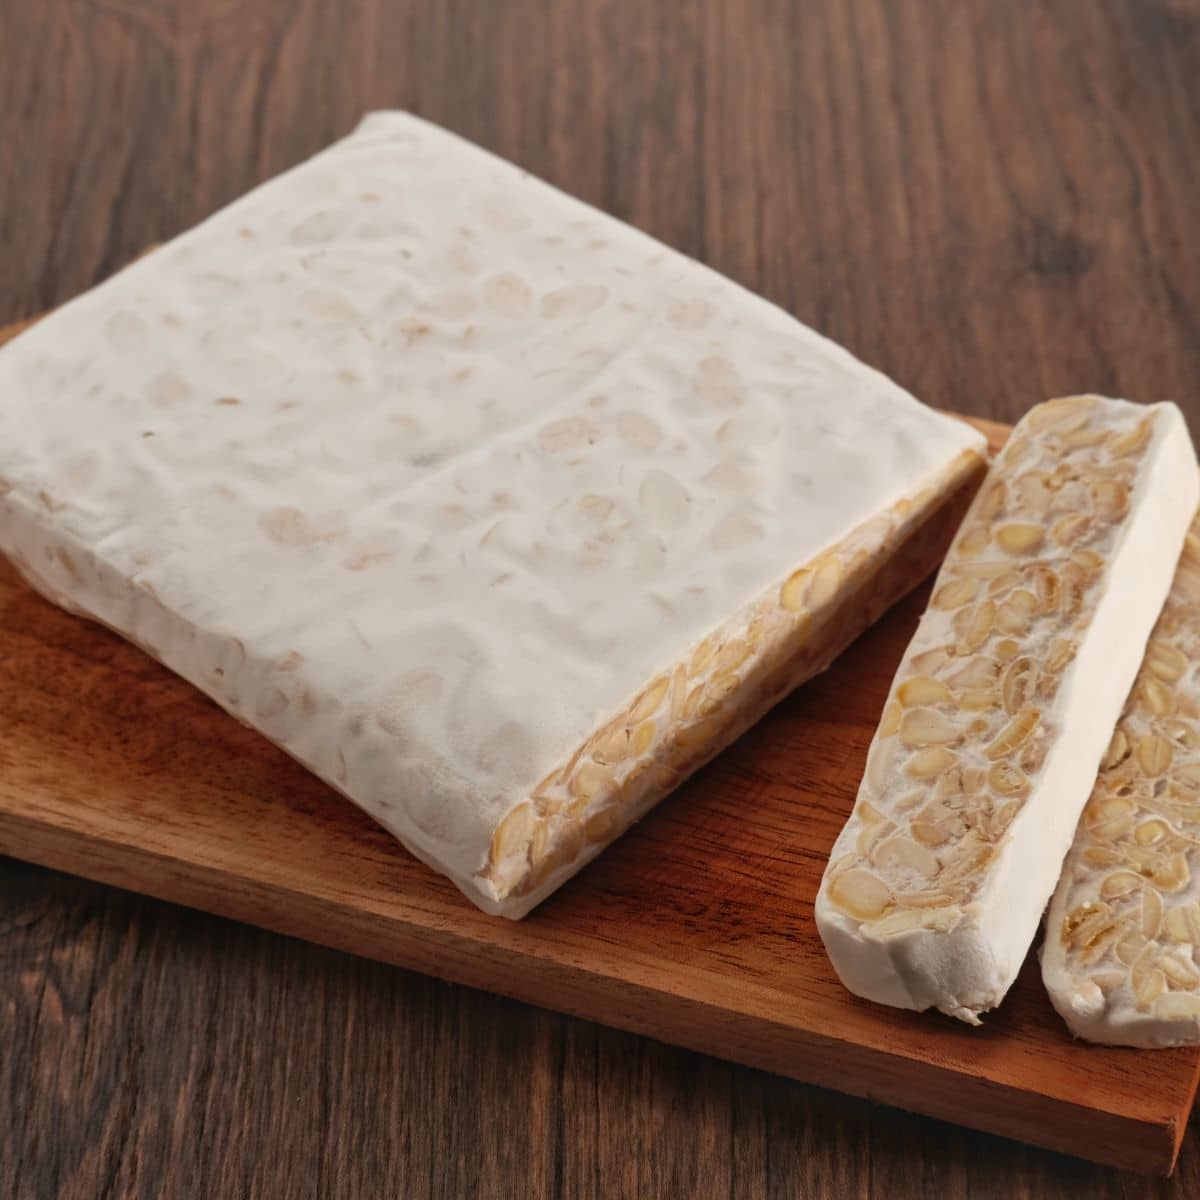
fermented-soybean-tempeh

What is Tempeh?

Originating from the Indonesian island of Java, this fermented soybean cake is nutty, savory, and a great source of protein. Now a staple for many vegetarians and vegans, it can be marinated, fried, or added to sandwiches, salads, stews, and more. The possibilities are limitless!

tempeh-in-banana-leaf

History of tempeh

Tempeh is a traditional Indonesian food made from fermented soybeans. The history of tempeh can be traced back to the 12th century, during the time of the ancient Javanese kingdom, where it was known as "oncom". It wasn't until the 17th century that tempeh became popular throughout Indonesia, thanks to the influence of Chinese immigrants.

The modernization of tempeh production began in the 20th century, with the development of new technologies for tempeh processing. Today, tempeh is not only a popular food in Indonesia, but it is also widely consumed in many other countries. Tempeh has also gained popularity as a sustainable food option, as it requires less resources to produce than meat and has a lower carbon footprint.

fresh-soy-bean-tempeh

Why Make Fresh Tempeh?

Making fresh tempeh offers several benefits over store-bought versions. Homemade tempeh is fresher, since it doesn't have to travel long distances or sit on store shelves for extended periods of time. This means that it retains more of its nutrients and has a fresher, more complex flavor.

Making your own tempeh allows you to control the ingredients and ensure that they are of high quality. You can also experiment with different types of soybeans, grains, and seasonings to create a customized tempeh.

Making tempeh at home is more cost-effective than buying it pre-made, especially if you make it in large batches. It is a great technique for balancing your food costs!
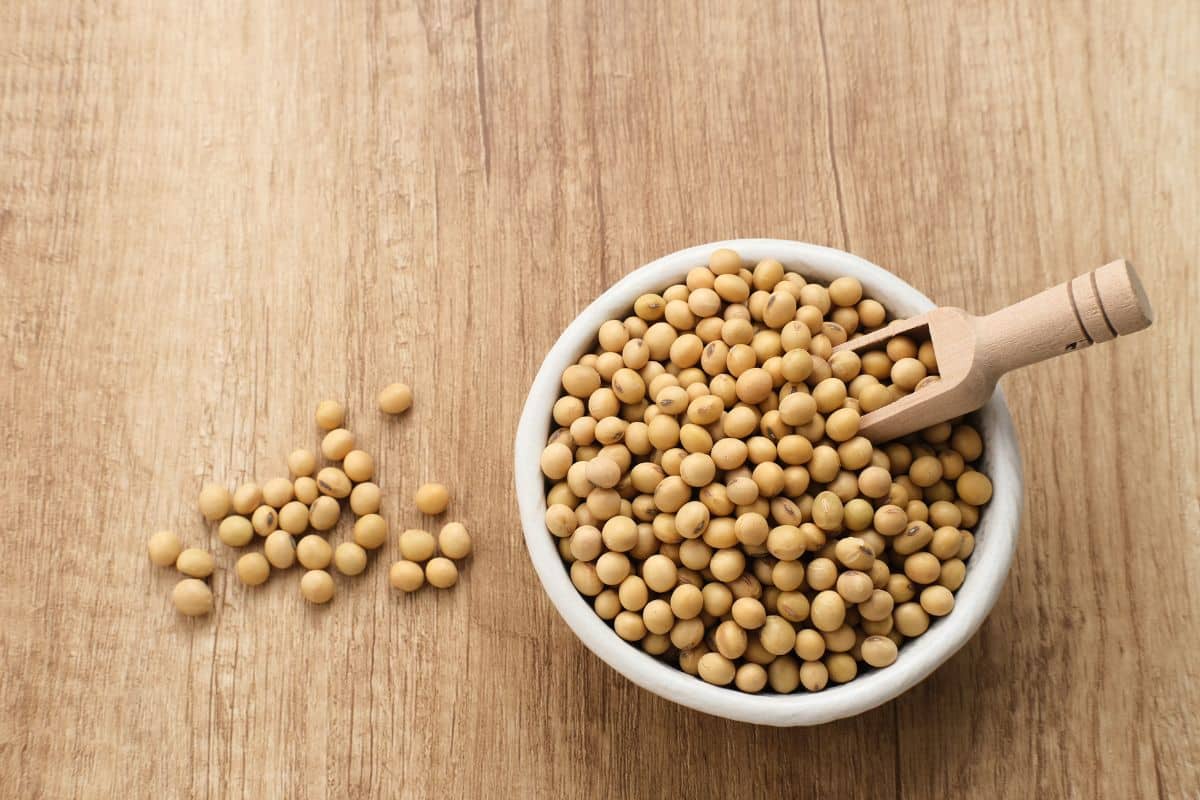
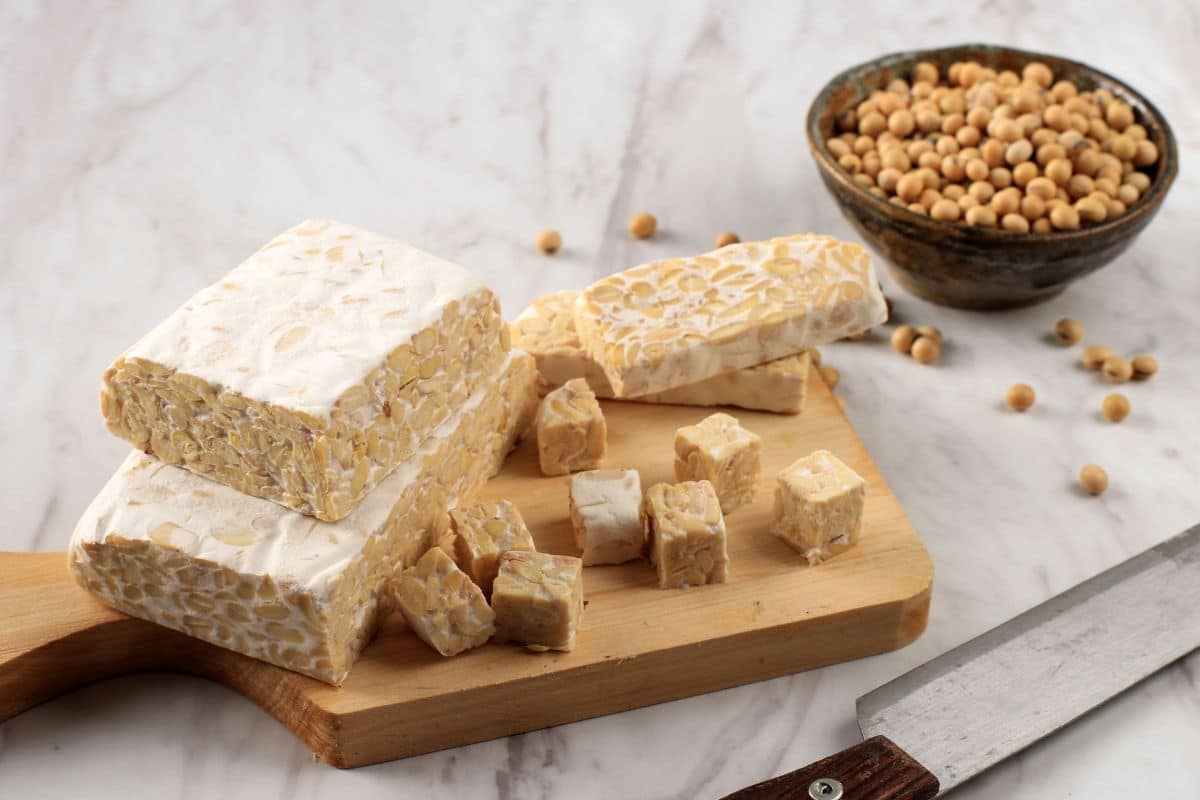
dried-soy-beans

Soy Beans

Tempeh is traditionally made with soybeans, and that is what is shown in this tutorial. However, you can actually make it with any beans, like black beans, black-eyed peas, and chickpeas. You can also use grains such as brown rice, barley, or millet. In fact, tempeh can be made with just grains and no beans at all. Seeds like sesame, flax, or sunflower can also be added.

The Tempeh Starter

Making tempeh is a process of controlled fermentation. The beans are inoculated with a starter culture that contains Rhizopus mold spores (either Rhizopus oligosporus or Rhizopus oryzae), and then fermented at a warm temperature.

As the mycelium grows, it binds the beans into a dense, white cake. There are many sources for tempeh starters. You can source easily online via a search.

The Container

Tempeh should be made in a vented container with the beans lightly packed and no more than 1 inch deep. The vents must be large enough to allow for air circulation, yet not so large that the beans dry out.

I like using perforated zip-lock bags because they require little prep, they make it easy to see what is going on during incubation, and they form a tempeh cake with good size and shape. All you need to do is prick the bags with a skewer or large needle.

Other options include vented tupperware containers, a baking pan or pie plate with perforated aluminum foil or plastic wrap on top, or the traditional Indonesian banana leaves.

The Incubator

In order for the mycelium to grow, the beans must be kept at a temperature between 85ยฐ and 90ยฐF (30c)for 24 to 48 hours. If the temperature is not warm enough, the tempeh spores may not grow and you may get unwanted bacteria. Conversely, if it is too hot, the spores may die.

A box-style dehydrator such as an Excalibur is a great incubator because it has a thermostat and room for air to circulate. Other options include an oven with the light on, a cupboard or cooler with a lightbulb or heating pad or a warm place in your house. Whatever you do, you want to make sure your incubator has good air circulation, so crack the door open if using an oven, cooler, or cupboard.
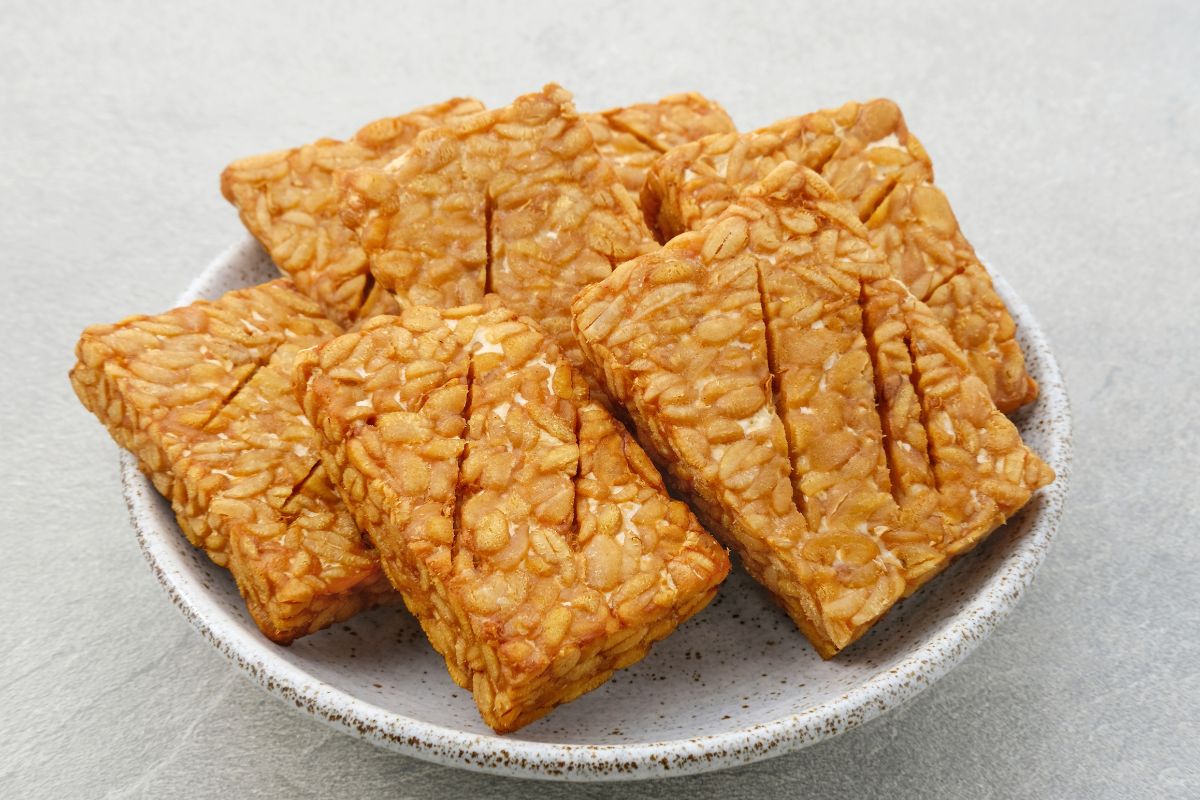
Tempeh recipe ideas

The possibilities for tempeh based recipes are limitless! You can add tempeh to almost any savory recipe. It provides a solid protein element to any recipe. Tempeh absorbs flavor really well, so no excuses for it not tasting good!

cooked-tempeh-cakes

More recipe to try

  • Chickpea Tofu

๐Ÿ“‹ Recipe

fermented-soybean-tempeh
Jamie Raftery

How To Make Tempeh

5 from 1 vote
Discover the art of tempeh making
Print Recipe Pin Recipe Add to CollectionGo to Collections
Prep Time 20 minutes mins
Cook Time 1 hour hr
Fermenting time 2 days d
Total Time 2 days d 1 hour hr 20 minutes mins
Servings: 4 Tempeh cakes
Course: Fermentation
Cuisine: Indonesian
Calories: 436
Ingredients Equipment Method Nutrition Notes

Ingredients


  • 1000 g Soybeans
  • 4 tablespoon Cider vinegar
  • 2 teaspoon Ragi tempeh starter culture

Equipment

  • Large mixing bowl
  • Colander
  • Saucepan - large size
  • Tray
  • Paper towl
  • Spoons
  • Ziplock bags
  • Skewer
  • Dehydrator

Method
 

Soak the beans:
  1. Place the beans in a large bowl and cover by 3 inches with water. Let stand overnight or at least 12 hours.
De-hull and split the beans:
  1. The hulls or skins need to be removed in order for the spores to inoculate the beans. Using your hands or a potato masher, knead and squeeze the beans so that the hulls fall off and the beans split in half. This is the most labor-intensive part of the tempeh-making process and may take 10 to 20 minutes. Don't worry about de-hulling and splitting every last bean, but do try to get a majority of them. Periodically stir the water so the hulls to float to the surface; skim them off and discard them.
Cook the beans:
  1. Drain the beans, transfer them to a large pot, and cover by 2 inches with fresh water. Bring to a boil. Skim off and discard any foam or hulls that rise to the surface. Reduce the heat and simmer, partially covered, until the beans are tender but not mushy - about 45-60 minutes.
Prepare the zip lock bags:
  1. While the beans are cooking, prepare the bags. Using the skewer or a large needle, prick holes in the bags at 1-inch intervals.
Dry the beans:
  1. Drain the beans with a colander. Spread them out on two towel-lined baking sheets and pat them dry.
Cool the beans:
  1. Let the beans cool to below body temperature.
Add the vinegar:
  1. Transfer the beans to a clean, dry bowl. Sprinkle the vinegar over the beans and mix well. Adding vinegar lowers the pH and prevents the growth of unwanted bacteria.
Add the tempeh starter:
  1. Sprinkle the tempeh starter over the beans and mix for about a minute to distribute evenly - this is an important step to make sure the culture is dispersed.
Fill the bags:
  1. Divide the beans between the two bags.
Flatten the bags:
  1. Seal the bags and flatten the beans out evenly. Pack down tightly, and make sure not too loose.
Incubate the tempeh:
  1. Place the bags in the incubator. The temperature must be between 85ยฐF and 90ยฐF (30c) for the next 24 to 48 hours, so periodically check to make sure the temperature is consistent.
Check at 12 hours:
  1. Between 12 and 24 hours you should start to see some white mycelium growing on the beans. You may want to lower the heat source because the beans will start generating their own heat as the mold grows; an instant-read thermometer is handy for checking the internal temperature of the fermenting tempeh.
  2. Continue to incubate up to 48 hours: Depending on your conditions, the tempeh may take up to 48 hours total. The mycelium will continue to thicken, forming a white layer around the beans and binding them into a dense, firm cake. The tempeh is done when the entire surface is covered with dense, white mycelium (some black or gray spots are okay), as well as the spaces between the beans.
  3. The beans should be bound together firmly as a cake. You may want to slice a small piece off the edge to make sure the cake is firm all the way through. The tempeh should smell pleasantly nutty and mushroomy. It may also have a light ammonia smell.
Stop the fermentation:
  1. Remove the bags from the incubator and let the tempeh cool to room temperature. Transfer the tempeh cakes to airtight bags or containers and store in the refrigerator up to 1 week.
Using tempeh:
  1. Use freshly-made tempeh in your recipes! Tempeh can be eaten raw or cooked. Cooking brings out the nutty flavor, and some people prefer cooked because it can be slightly bitter raw. The recipe possibilies are limitless!
Freezing tempeh:
  1. To freeze the tempeh, steam it for 20 minutes and then freeze in an airtight container up to 3 months.
Troubleshooting:
  1. You may see some black or gray spots on the tempeh, especially near the air holes - this is completely normal and safe. If you see any other colors or if the tempeh is mushy, slimy, or smells bad, you should discard it.

Nutrition

Serving: 150gCalories: 436kcalCarbohydrates: 25gProtein: 42gFat: 22gSodium: 593mgPotassium: 1298mgFiber: 15gSugar: 8gVitamin A: 23IUVitamin B1: 0.4mgVitamin B2: 1mgVitamin B3: 1mgVitamin B5: 0.4mgVitamin B6: 1mgVitamin C: 4mgVitamin E: 1mgVitamin K: 48ยตgCalcium: 256mgCopper: 1mgFolate: 135ยตgIron: 13mgManganese: 2mgMagnesium: 216mgPhosphorus: 614mgSelenium: 18ยตgZinc: 3mg

Notes

Other beans:
To make tempeh with other beans, process them like soybeans. Boiling time may vary.
Grains:
To substitute grains for some or all of the beans, soak them overnight and cook them separately from the beans. Cool and dry the grains and then mix them with the beans before adding the vinegar and tempeh starter.
Seeds:
To substitute seeds for some of the beans, you can soak them or not. If soaking, be sure to dry them well. Mix the seeds with the beans before adding the vinegar and tempeh starter.

Tried this recipe?

Let us know how it was!

More Fermentation Recipes

  • khao-mak-thai-fermented-rice
    Khao Mak | Traditional Thai Fermented Rice Dessert
  • water-kefir-in-a-bottle-and-jar
    How to Make Water Kefir
  • mung-bean-rejuvelac-pouring-into-a-glass
    Rejuvelac
  • sliced-tofu-misozuke-vegan-cheese
    Tofu Misozuke (Miso Fermented Tofu Cheese)
5 from 1 vote (1 rating without comment)

Did you make this recipe? Let me know! Cancel reply

Your email address will not be published. Required fields are marked *

Recipe Rating


jamie-and-thara-operators-of-holistic-chef-academy

Hi, weโ€™re Thara & Jamie

Weโ€™re a Thaiโ€™rish chef duo based between our jungle kitchen studio in Phuket, Thailand, and a new culinary studio and permaculture farm weโ€™re developing in Galway, Ireland.

Together, we run the Holistic Chef Academy - a space for exploring healthy, wholesome, plant-based cuisine.

With our roots in Michelin-star kitchens and a shared passion for food as medicine - we create recipes, courses, and experiences that aim to educate, inspire, and empower.

Read more

Cooked @

brand-logos-for-restaurants-jamie-cooked-in

Juicing Resources

  • how-to-juice-cleanse-ingredients
  • 3-day-juice-cleanse-juices
  • preparing-beetroot-for-juicing
  • benefits-of-cold-pressed-juicing-cover

Trending Recipes

  • pineapple-tepache-fermenting-in-a-glass-jar-ready-to-serve
    Pineapple Tepache | Probiotic Home Brew
  • homemade-hibiscus-tea
    Hibiscus Tea (Rosella Tea)
  • beetroot-liver-cleanse-juice
    Beetroot Liver Cleanse Juice
  • pumpkin-soup-with wild-mushrooms-and-pumpkin-seeds
    Spiced Pumpkin Soup - Vegan

Footer

^ back to top


Recipes

My Recipe Collections

Breakfasts

Juices

Main Meals

Desserts

Resources

About

FAQ

Services

Eat For Life

Privacy Policy

Connect

Subscribe

Contact

Trustpilot Reviews

Join the community!

  • YouTube
  • Instagram
  • Facebook
  • Pinterest
  • LinkedIn
  • Twitter

Rate This Recipe

Your vote:


A rating is required
A name is required
An email is required

Recipe Ratings without Comment

Something went wrong. Please try again.